
As a business owner, offering a product design tool in your store is as challenging as it is rewarding. Even after you install the tool, you need to acquaint yourself with a few functions and features. In doing so, you might have some queries like how to set dimensions of a print file or how your shoppers can use certain features.
To help you with this, we have prepared this post to address common questions that business owners have while using our product design tool.
Q. How to set DPI value?
DPI is helpful for high-resolution output files. You can set your choice of output files by setting DPI values from the backend.
To set the DPI value, go to Stores → Configurations → DPI Configuration. From here, you can select the DPI value of your choice.
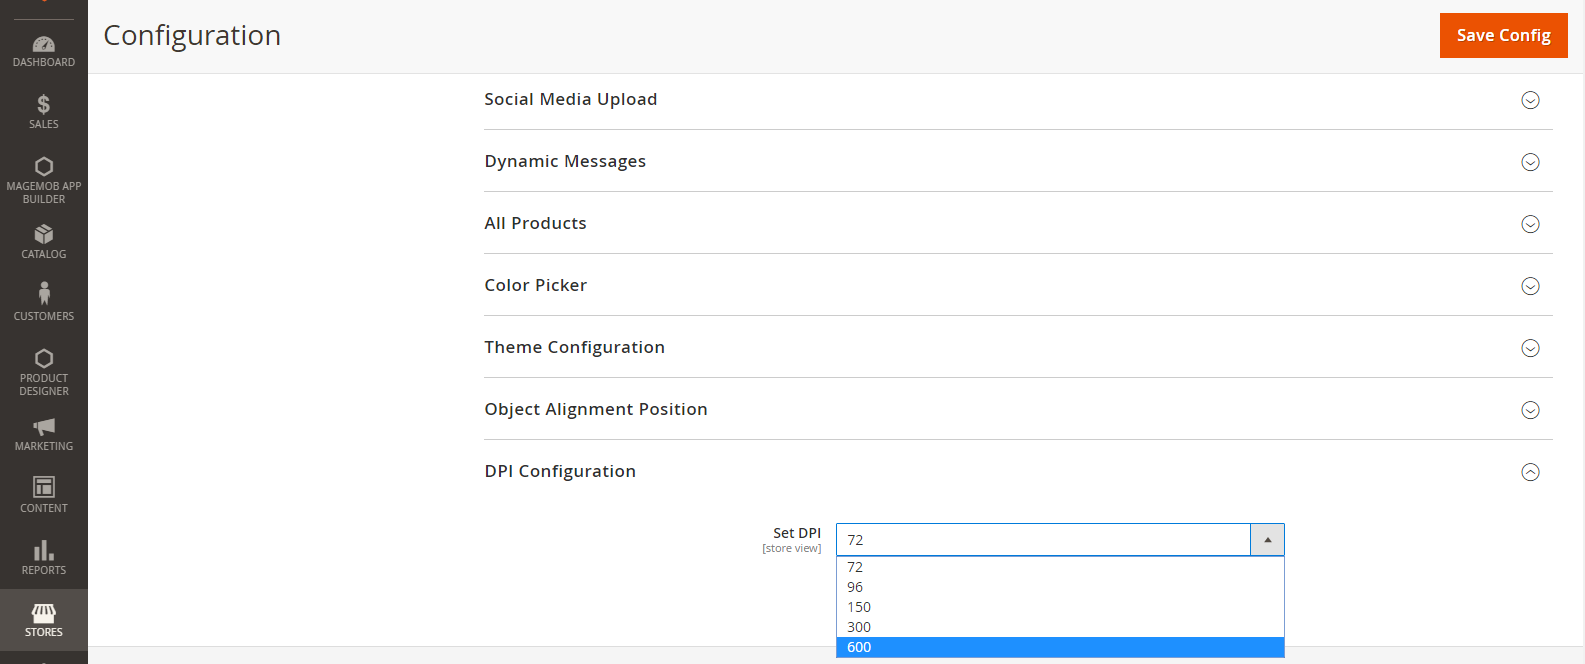
(Select the DPI value of your choice from the backend)
Q. Can I set custom dimensions of the output files?
Yes, you can set custom dimensions of the output files, which are ready for printing. You can do so by entering values for height and width output files in pixels.
To set values, go to the Product Page → Product Designer option and set your preferred height and width in Custom output width and Custom output height attributes. Note that the values should be proportional to the product image dimensions.

(Set custom dimensions of the output file)
Q. Can shoppers change the size, brand, or color of a product from the front end?
Yes, only if the admin has added configurable products with various configurable attributes like product color, brand, size, etc. Configurable products will allow your customers to choose from available options while placing an order. They can do so by clicking ‘Product Option’ on the right side of the designer tool page.
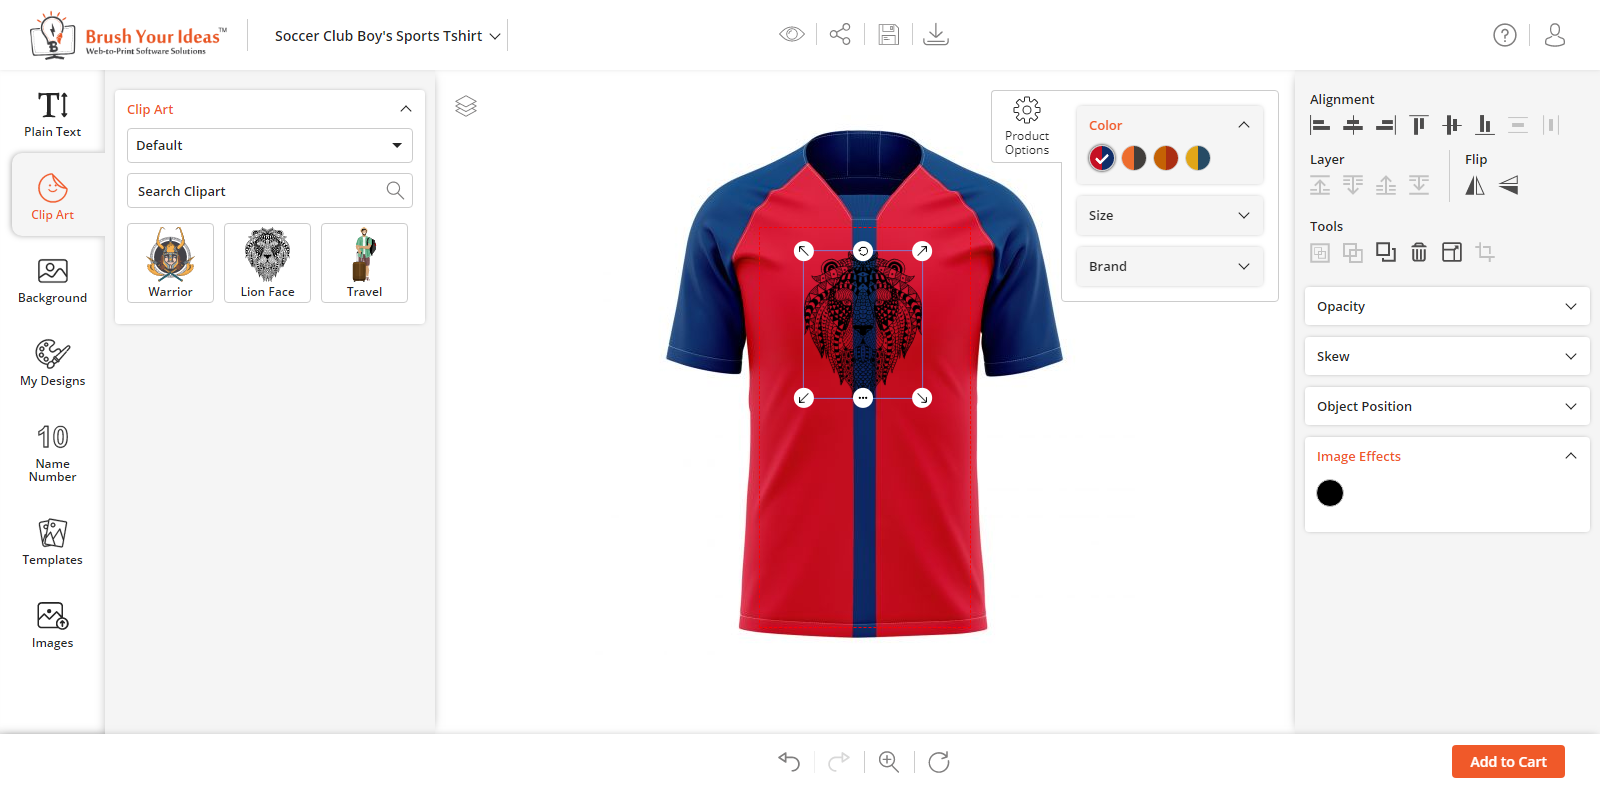
(Product option that enables an end-user to change product color, size, or brand)
Q. How can an end-user change the sides of an image?
Once you set image sides and design area from the back end, your customers can see the product with the configured designing area. They can change sides of the product by clicking on the ‘Next Side’ and ‘Previous Side’ buttons.
Q. How will an end-user know what attributes an admin has configured?
Once you configure attributes from the backend, customers will see all the configured attributes on the detail Product page by clicking on that product. They can also view by clicking on the gear icon in the upper right corner of the product canvas.
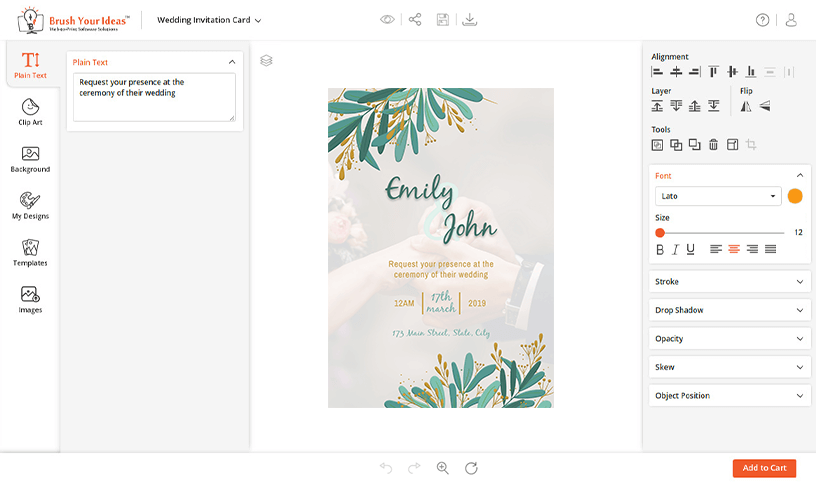
Q. How can a user manage text design from the front end?
To enter text on the product, users need to click on the ‘Text’ tab in the designing explorer. Then, they can keep adding text until the text limit has exceeded. After that, customers will get an alert message exceeding the configured text limit.
(Easy to add and edit text design)
After inserting text, the designer tool will be enabled on the right side. From here, customers can customize the font size, style, color, and text alignment.
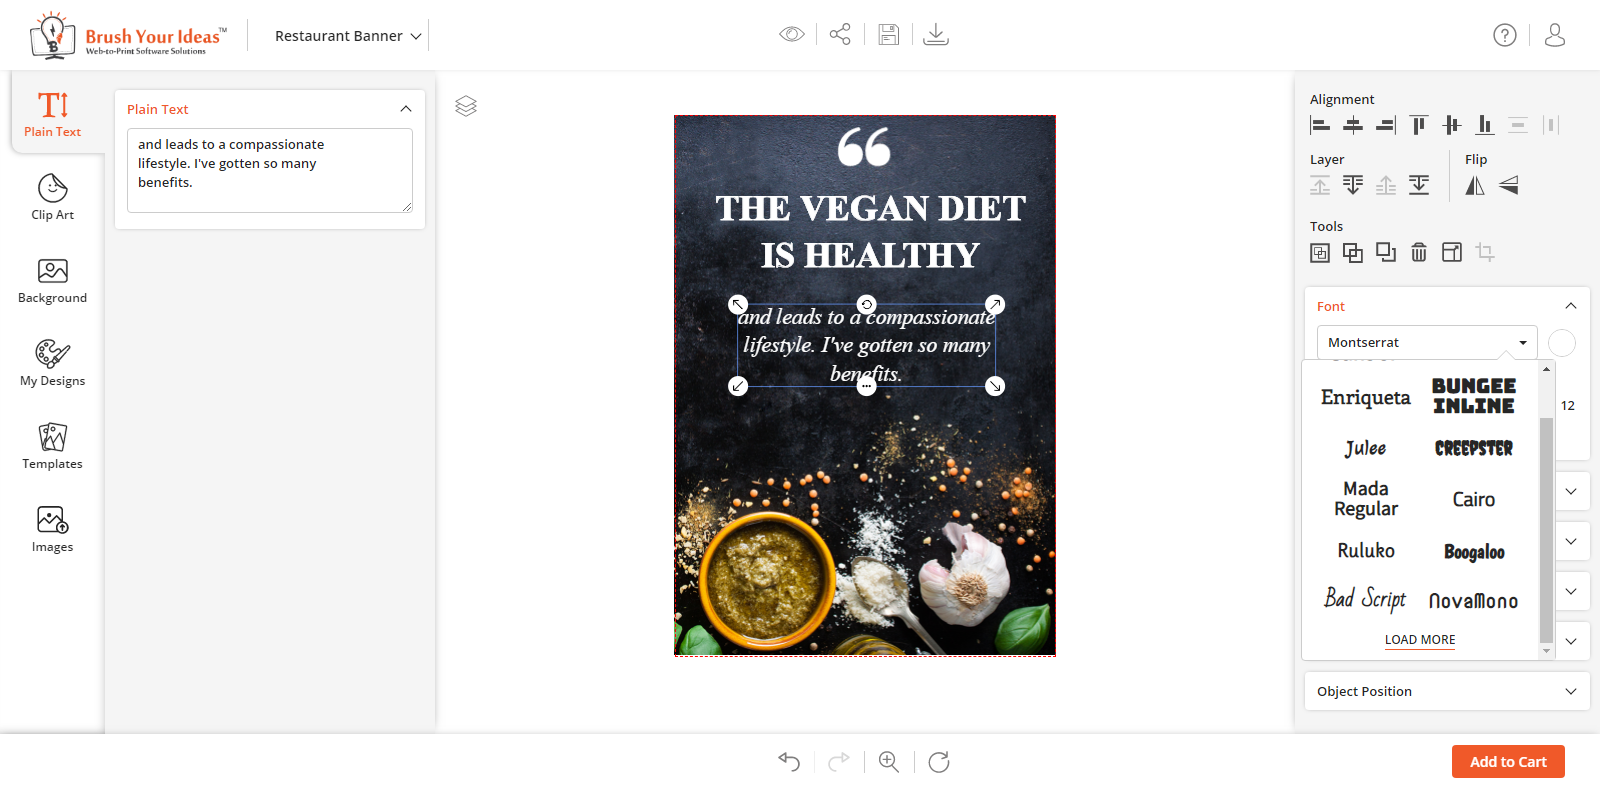
Q. How can a user apply text effects on the designer tool page?
Following are the options that a user gets to apply text effects on a product:
- Font Style, Color & Size: Customers can select their favorite font style and pick a color from the ‘color selection’ option. They can increase the font size by dragging the text size slider to the right & left to decrease. Customers can also edit the text in Bold, Italic, and Underline, and adjust text alignments to left, center, right and justify.
- Stroke: To add an outline text effect of a particular color on a text.
- Drop Shadow: To adjust text-shadow effects horizontally (X-offset) & vertically (Y-offset) on a text.
- Skew: To give horizontal or vertical italicized effects to a text.
- Object Position: To change X-Y coordinates for positioning (Horizontal-Vertical).
(Shoppers can easily apply text effects like stroke, opacity, etc. from the front end)
Q. How do image effects work on the front end?
Once the admin configures image effects have from the back end, customers can view the image filters on the right side of the designer tool. As soon as customers add clipart or upload an image, this option will be displayed.
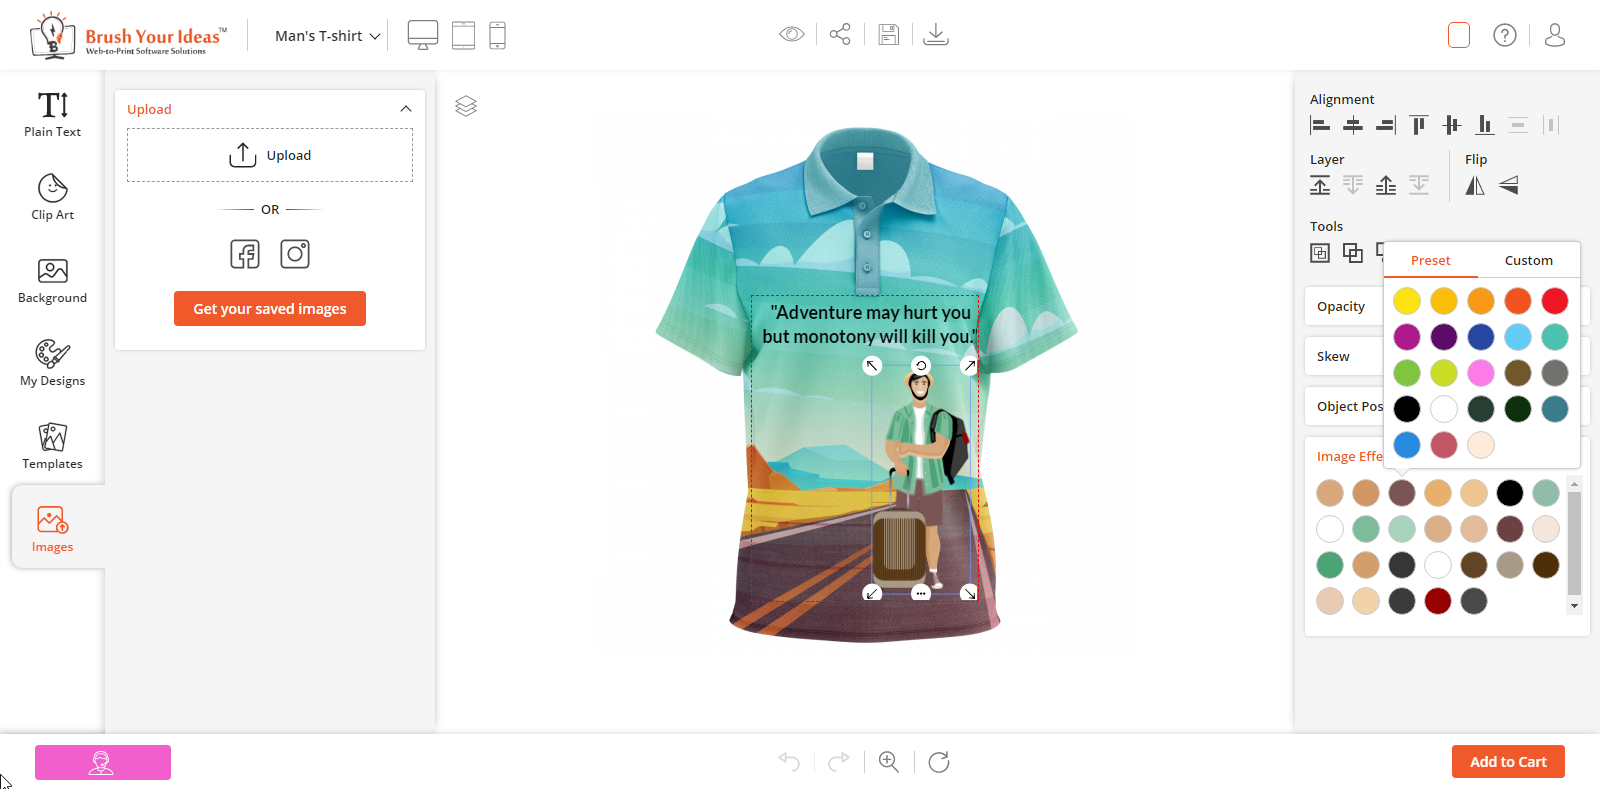
(Image effects – front end)
Note that image filters will apply only if the file format of an image is JPEG & PNG. But, if the file format is SVG, the customers can only change the internal colors of that image.
Q. How can a user use clipart? And what if they want to crop clipart as per their wish?
Customers can see clipart in the grid view. They can explore, search and filter clipart provided as configured from the backend. Customers can crop the clipart images, but the cropping is not applicable on SVG format images. SVG format images. Additionally, they can even apply image effects to clipart, set alignment, rotate, flip, and more.
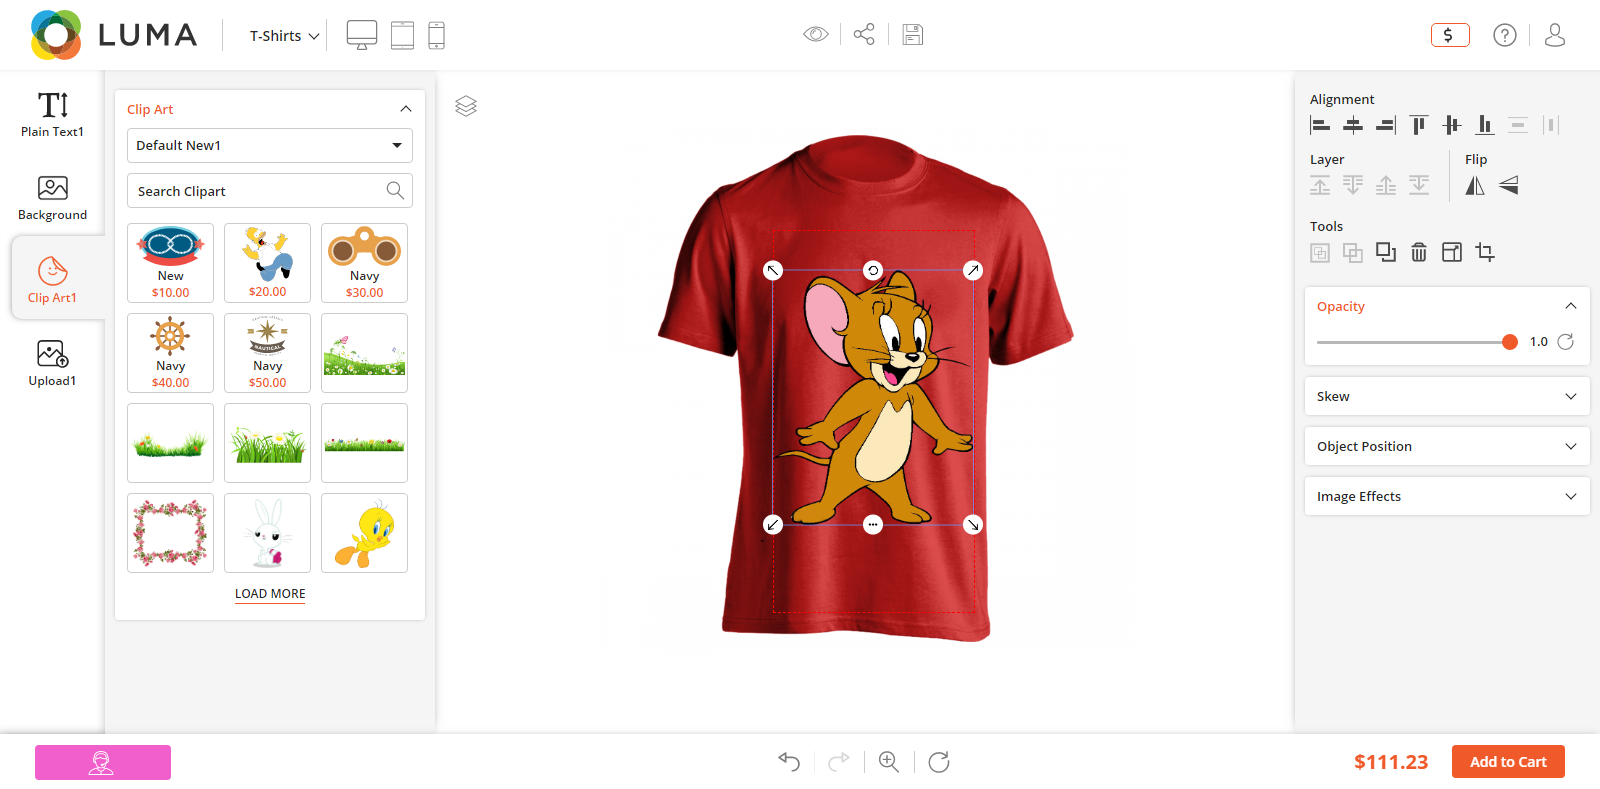
(Search, filter, crop, and edit clipart from the front end)
Q. What are some prerequisites for customers to be able to upload a custom image?
After an admin finishes backend configurations for custom image upload, shoppers should be able to upload images by navigating the ‘Upload’ tab’ from the designer explorer (left side).
Sometimes, if an admin has enabled the ‘User’s confirmation before uploading image’ option from the back end, customers will have to check the confirmation checkbox. Only then can they upload any image from the system’s folder.
The customers can also get previously uploaded images by click on ‘Get Your saved Images.’ But for this, they should be logged in to their accounts.
Q. Can a user crop an image that they have uploaded?
Yes, a user can crop an uploaded image using the ‘crop’ option given on the right side under the tool option. However, cropping is supported only for JPEG & PNG formats and not an SVG format.
A user can even delete an uploaded image by clicking the ‘Delete’ icon, which appears on dragging the mouse cursor on a particular image.
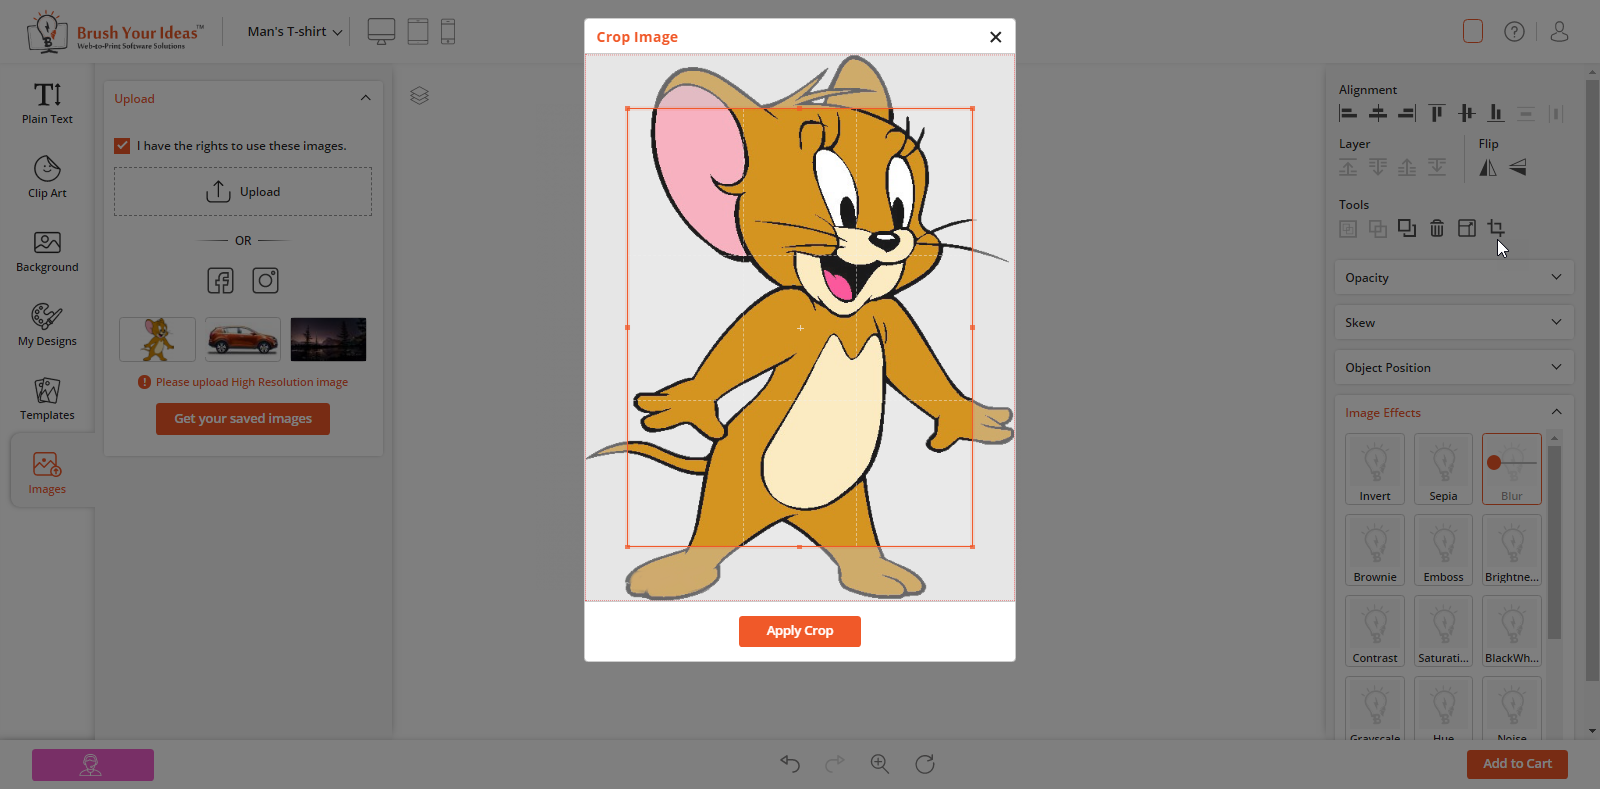
(Your customers can crop and even delete an uploaded image)
Q. How can an end-user download their design?
For your users to download their design, you need to enable the ‘Download’ option for the product designer page. After you finish the configuration, shoppers can download their customized product image by clicking on the ‘Download’ icon. The download icon will also be provided in the preview pop-up.
Q. How does object management work for end-users?
In our product designing tool, customers can easily align individual objects on the canvas and manage the sides. They can also rotate and flip the elements using the tool.
Our designing tool offers two tools to manage alignments and sides. They are Layer Management & Object Alignment.
Q. What are the benefits of object alignment for end-users?
Using object alignment, your customers can manage the alignment of objects in product design. The following options are given to manage the alignments:
- Align Left: Click on this icon to align the object towards the left on the canvas.
- Align Horizontal Center: Click on this icon to align the object in the center horizontally.
- Align Right: Click on this icon to align the object towards the right.
- Align Top: Click on this icon to align the object towards the top in the canvas.
- Align Vertical Center: Click on this icon to align the object in the center vertically on the canvas.
- Align Bottom: Click on this icon to align the object towards the bottom of the canvas.
Q. What is the function of the layer icon for an end-user?
Layer management enables shoppers to manage layers of a product and the position of the object easily. By clicking on the ‘Layer’ icon, it will expand and display all layer management options for individual design objects. These options include the following
- View / Hide: With this icon, customers can view & hide any object. In the layer management panel, the view icon of the hidden object can be seen in red.
- Back / Front: By clicking on the front/back icons, customers can manage the forward/backward positions of the object as per their needs.
- Lock: The aim of the lock icon, to lock an object. End-users can use this to prevent the editing of that object. The lock icon of the locked object is marked in red.
- Delete: Users can delete any object layers by clicking on the ‘Delete’ icon beside that particular object.
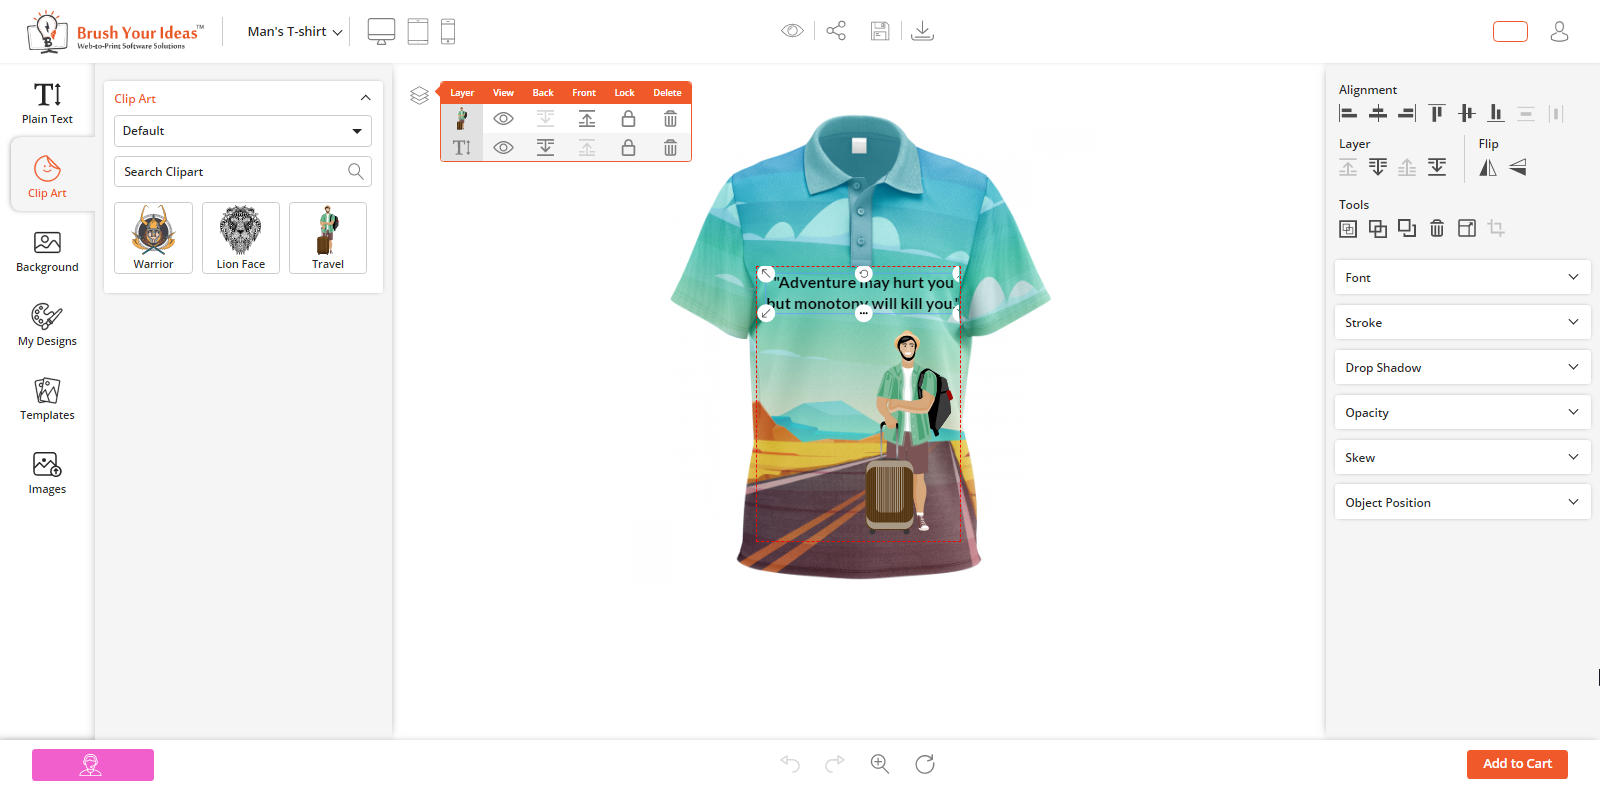
(Layer management feature on the product designer tool’s frontend)
Q. How does the design preview work on the front end?
Customers can see how their printed products will look through a full-screen preview after designing their products. To view the design, they need to click on the ‘Preview’ icon. Then a window will pop up on the screen displaying a designed product.
As shown in the below image, one can see a full-screen image of the product with an option to download.
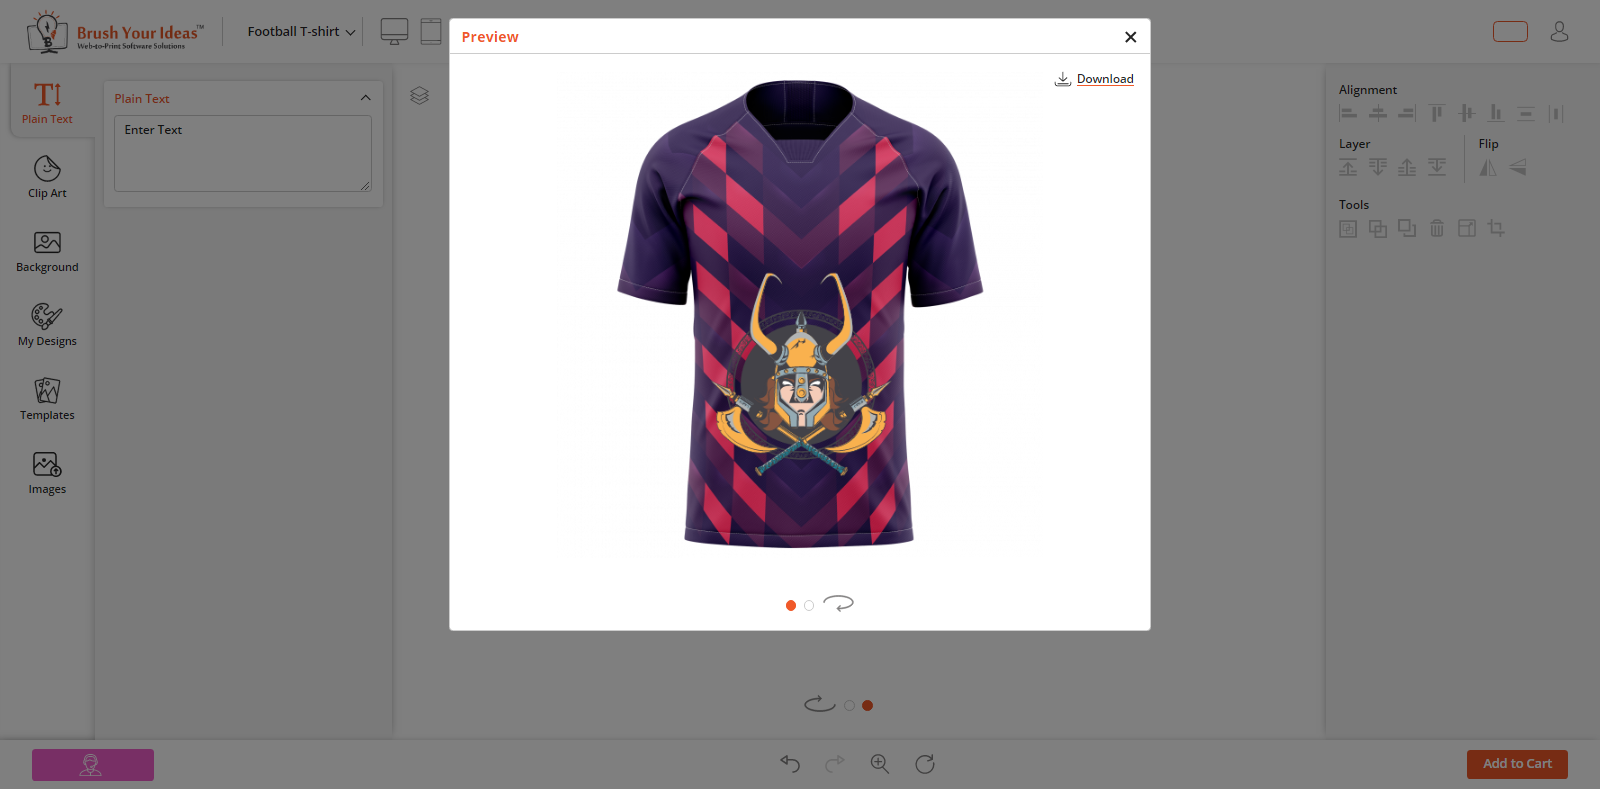
(Full-screen preview of a designed product)
Q. How does a print area warning message appear on the front end?
To warn your customers that they are designing out of the product designing area, you can add a message in the backend. By doing so, every time an object goes out of the designing area, shoppers will get a warning message.
Here’s how you calculate the image size on the front end. For instance, the output size is 1200 X 1200, size of image uploaded is 551 X 700, and product image size on front end is 540.
1200 -> 551
540 -> (?)
540×551÷1200 = 247.95
This means, if the image width on the frontend exceeds more than 247.95 px, the user will get a low-resolution warning message. As you can see in the image, the clipart is >247. And immediately, a reminder pops up – ‘some objects are outside the printing area and should be adjusted.’
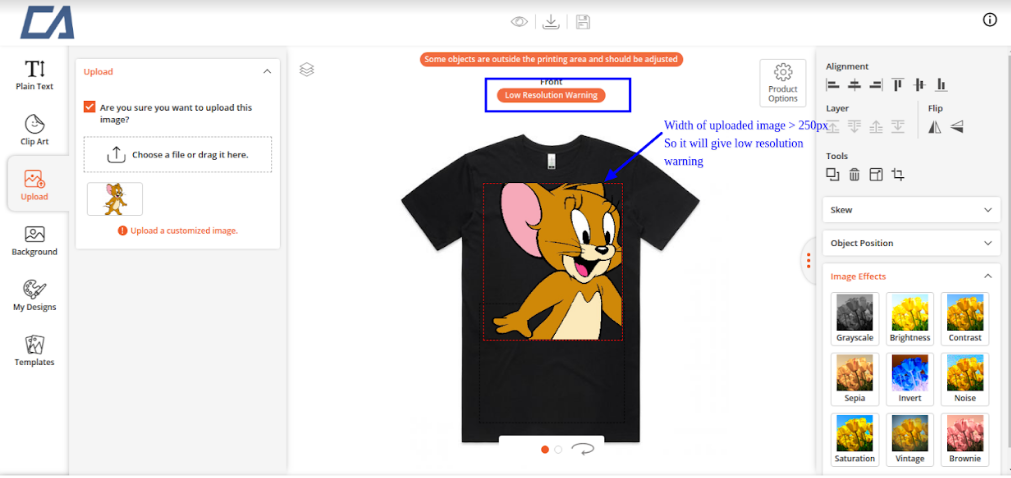
(Warning message appears on the frontend when an object exceeds the required size)
Q. How will a customer know if they upload a low-resolution image?
With our tool, admins can add warning messages in the backend. So, whenever an end-user uploads a low-resolution image on the product designing area, they will get a warning message as per your backend configuration.
Q. Can a shopper choose a product of their choice on the designer tool page?
Yes. End-users have an option to change a product. After you enable the ‘All Products’ section from the back end, shoppers can view the section on the front end. From here, they can easily change the product.

(Customers can view all products and choose from them)
Q. What is a User Guide? How is that helpful to my customers?
A User Guide is a feature that works as a tip and guides your customers throughout the designing process. It helps your customers utilize all the main tabs and designing features properly.
After you enable the User Guide in the backend, users can access it by clicking on any tab located on the ‘How do you want to start’ page.
The position (left or right) of the User Guide message on the front-end depends on where you add a message in the backend. If you have added a short message in the ‘Left Panel Tooltip’ from the backend, your customers will get the User Guide message on the left side. If you have added a message in the ‘Right Panel Tooltip,’ your customers will get the message on the right side.
Bonus question: When to Buy a Different Online Product Designer Software?
We hope this post answers your questions. In case of further queries, drop us a message, and we will get back to you.
All product and company names are trademarks™, registered® or copyright© trademarks of their respective holders. Use of them does not imply any affiliation with or endorsement by them.


