Summary
No points for guessing. Poor print quality is a nightmare for you. Everything is at stake if the quality is messed up – your customers, brand reputation, sales.
Most of the time, print mistakes are quite common but not unavoidable. However, having a Web to Print tool can help you overcome all the challenges by doing the heavy lifting. Whether it’s managing an image resolution or downloading a print-ready file in a desired file type, you can be rest assured that the tool will manage every little aspect on your behalf!
S0, what are some of the most common challenges and how exactly you can solve them using a Product Design tool, this post covers it all.
After a lot of research, and dealing with hundreds of print businesses just like you, we have prepared this elaborate post. It discusses some of the most common challenges faced by the printing industry and how the tool helps solve them.
Bleed and Safety Lines for Perfect & Uncropped Prints
Bleed, cut and safety lines are best features for any business that sells products like business cards, greeting cards, posters, photo albums, and even trophies.
It is a very simple yet the most effective feature to enhance the overall print quality, and avoid potential errors. It can prevent text or image from getting cut off in the printing process.
Here’s what these lines signify:
- Safety line: It acts as a safe space. Objects within the safety line will not get cut off during trimming.
- Cut line: It warns a user that any object outside the cut line may get trimmed during printing.
- Bleed: Bleed enables you to run a background or an artwork to the edge. It helps in avoiding spacing after trimming.
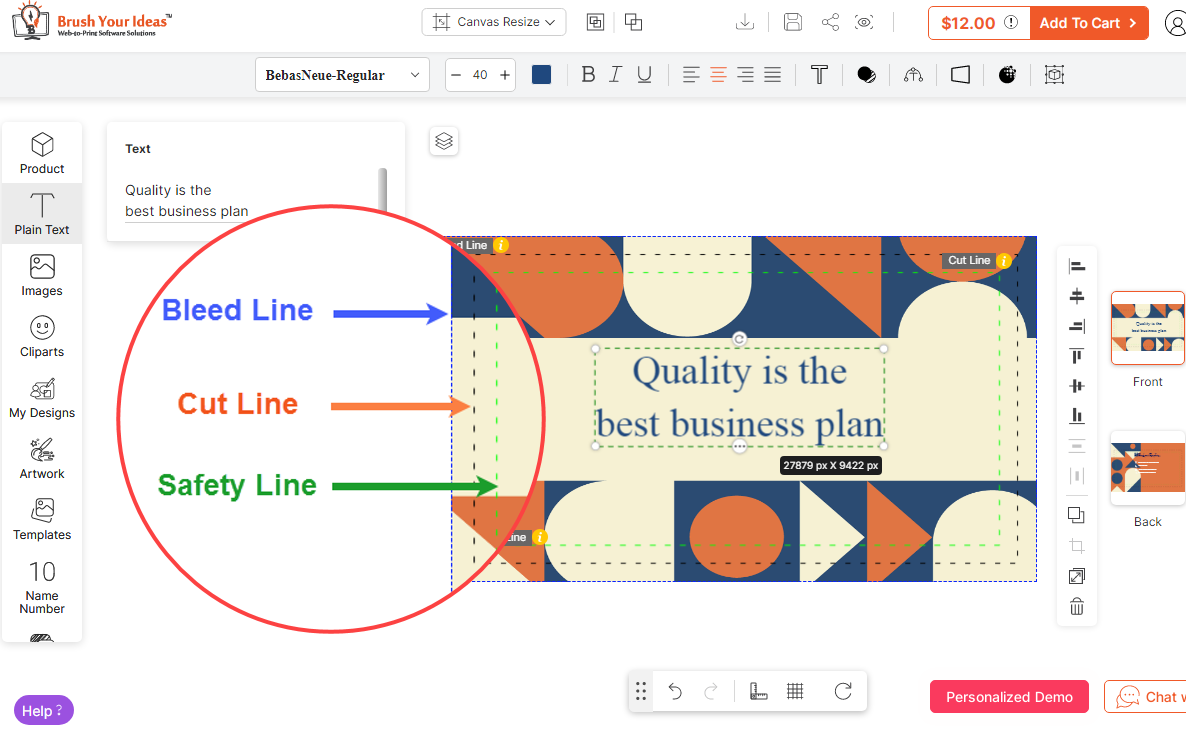
(Clearly highlight bleed cut safety lines to help end-users)
With a Product Design Tool integrated in your store, you can assist your customers in confidently designing a product.
From the backend, you can set these lines by selecting units like pixel, mm, or cm. You can choose the color for each line as per your need.
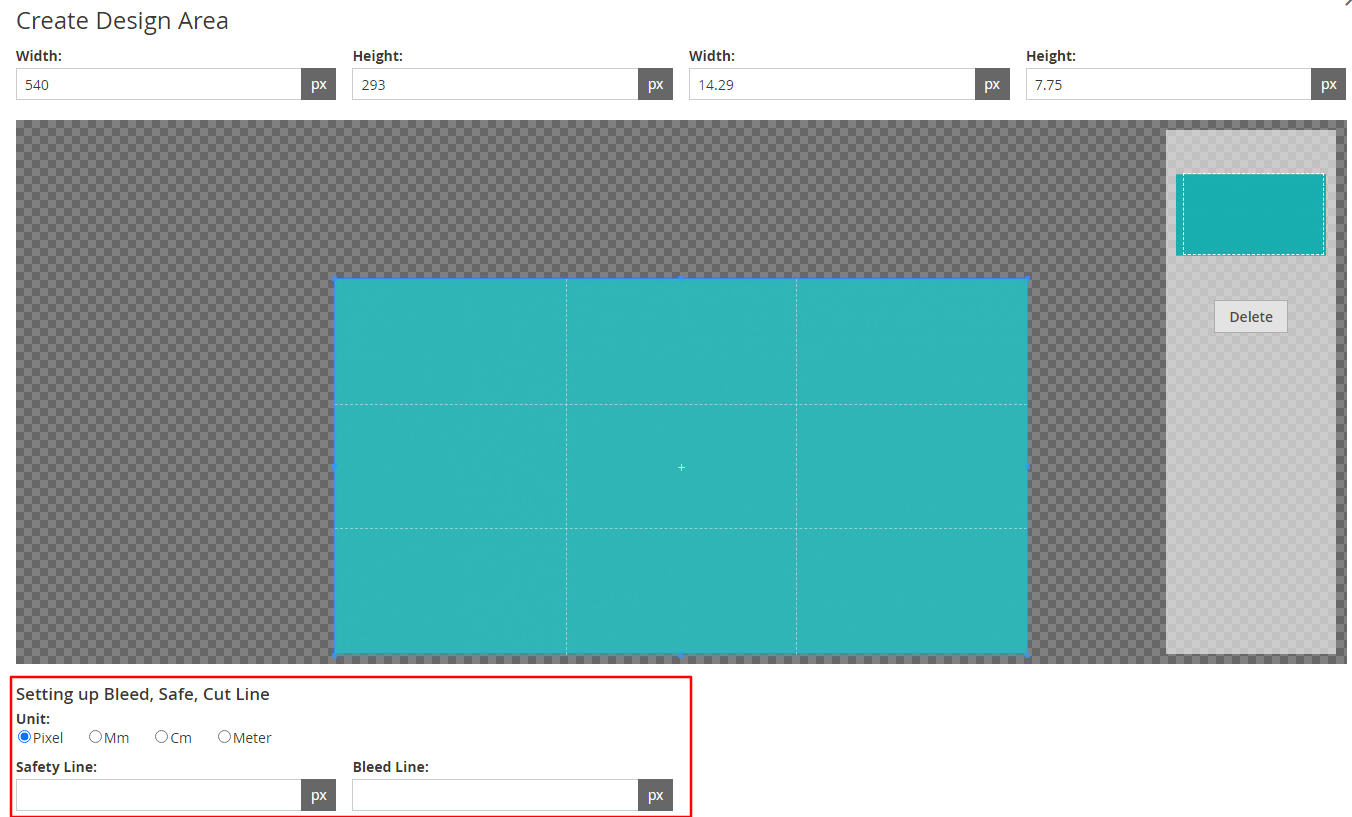
(Set bleed cut safety lines to help customers get perfect prints)
Explore in detail various features of the tool, and how your print business can benefit from it. Click the link below!
Click the link below!
CMYK Output File to Ensure Printed Colors are Same as The Picture Color
Final prints play a crucial part in customer experience. Many times, colors in the print are not as expected as they appear in a picture.
There is a perennial debate going on – how to get the best quality print? By offering RGB or CMYK?
RGB and CMYK both are different modes for mixing color in graphic design. However, RGB is more suitable for digital images like icons, graphics, logos, social media, etc. CMYK on the other hand is well-known for printed materials.
Saving a file as RGB impacts the final result leading to poor print quality. Now, in most cases printers convert the RGB file into CMYK.
There are different tools available including Adobe Photoshop Illustrator, and such to convert the file. However, that is an elaborate and a time consuming process.
Also, it doesn’t guarantee that the final output will be of a desired quality. Here, having a Product Design Tool cuts the need to spend time converting every file one by one.
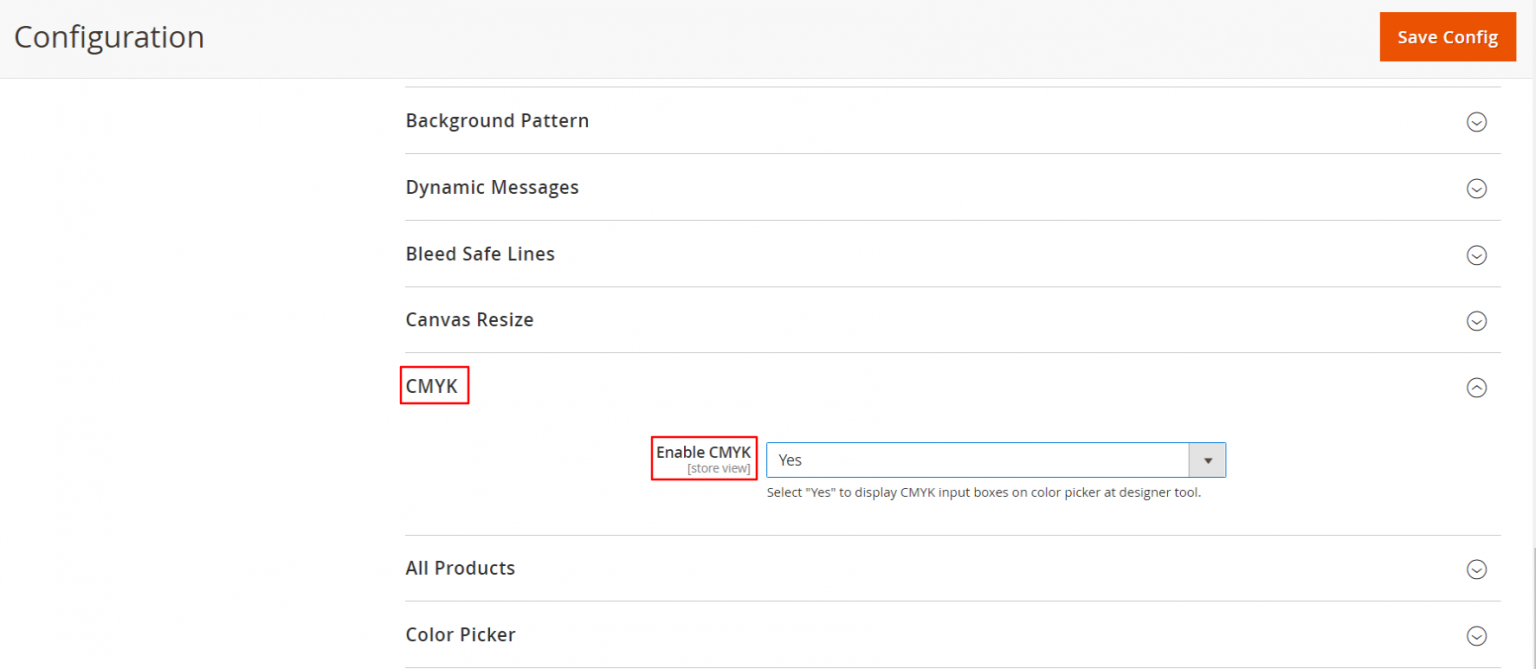
Because, before generating a print-ready file, you get an option to enable or disable the option for both RGB and CMYK as per your business needs.
Not just that, you can get your desired output file based on the printing method.
So, whether you have to print a hundred cards or five hundred t-shirts, you can save yourself the time to convert every file, and ultimately ensure great print quality.
Additionally, once you enable the CMYK option, end users can easily choose colors by inserting CMYK values.
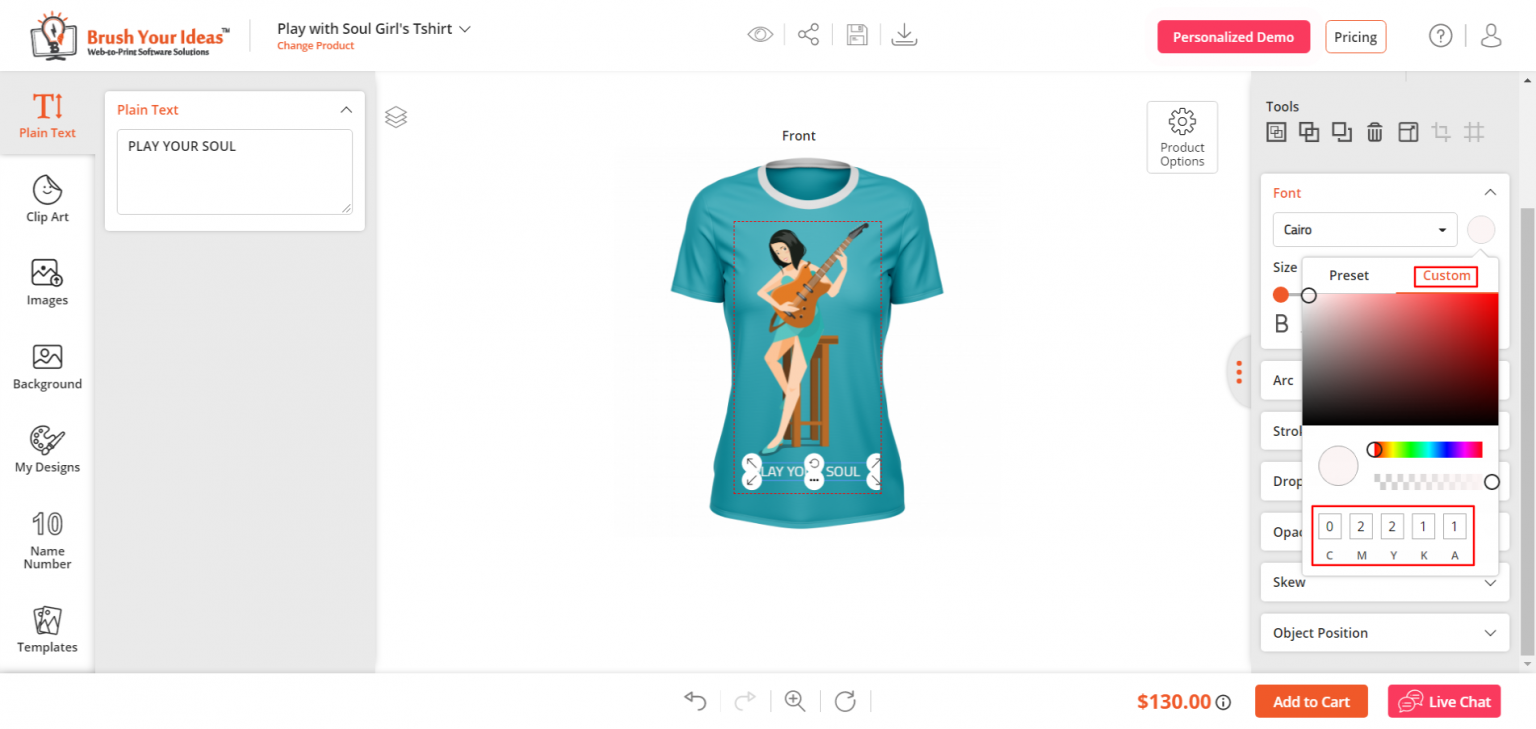
(Let customers choose colors by inserting CMYK value)
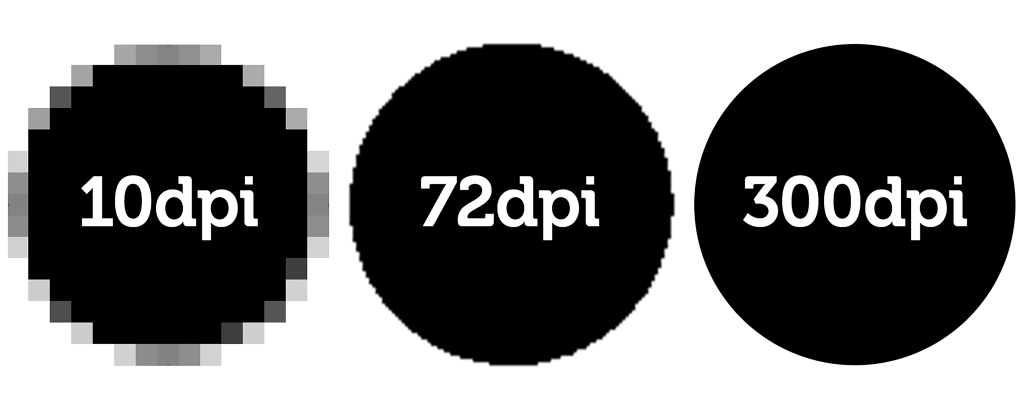
Solving The Perils of Low Resolution
For good print quality, it is necessary that a file should be at least 300 DPI. DPI is the number of dots in a printed inch.
The computer displays and prints the images in dots. The more dots the higher the quality of the print, and more details and sharpness.
Shown in the below image is the difference between various DPIs.
- 10dpi: The image with 10dpi looks blurry as it consists of fewer dots.
- 72dpi: The image with 72dpiI looks better than the image with 10dpi. However, it is not recommended for print.
- 300dpi: The file generated more than 150dpi will have a good quality image. The image is more clear and sharp than the rest.
Using the Product Design Tool, you can select different DPIs for the output generation on your store. Here’s a screenshot of the backend of the tool where you can select DPI values from 72, 96, 150, 300, 600.
You can also give a warning message every time a customer uploads a low-resolution image. In the backend, you will land on the Configurations page. From the ‘Custom Image Upload’ section, you can carry out the following configurations.
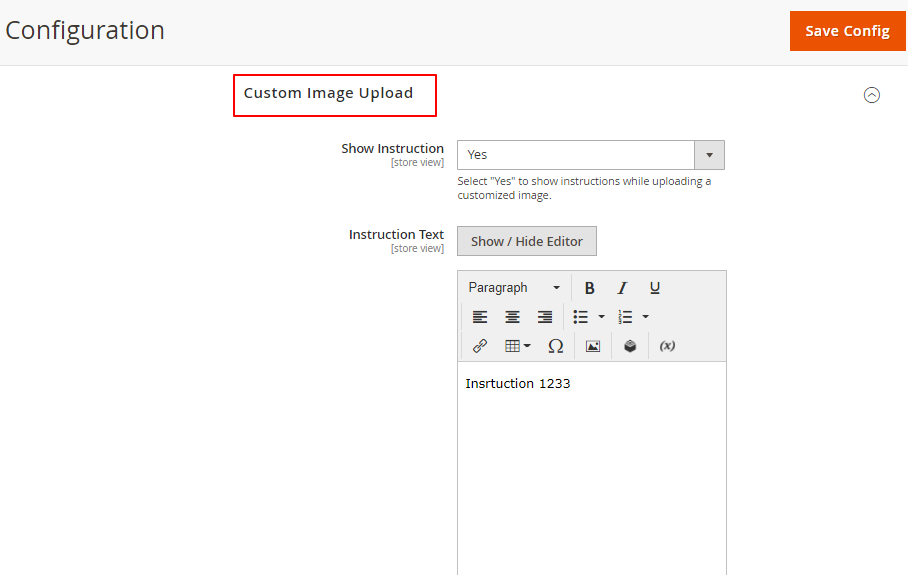
(Set minimum or maximum size of the image, and add instruction message)
- Select “Yes” to show the instructions while uploading a customized image. Along with it, also enter the instructions that you want to display on the frontend.
- Enter the minimum or maximum size of the image in Megabytes.
- If someone uploads a low quality image, this sort of warning will be shown to the end-users.
You can add all sorts of dynamic messages like print area warning or image resolution warning to avoid potential errors, fasten the pre-press process, and ensure great print quality.
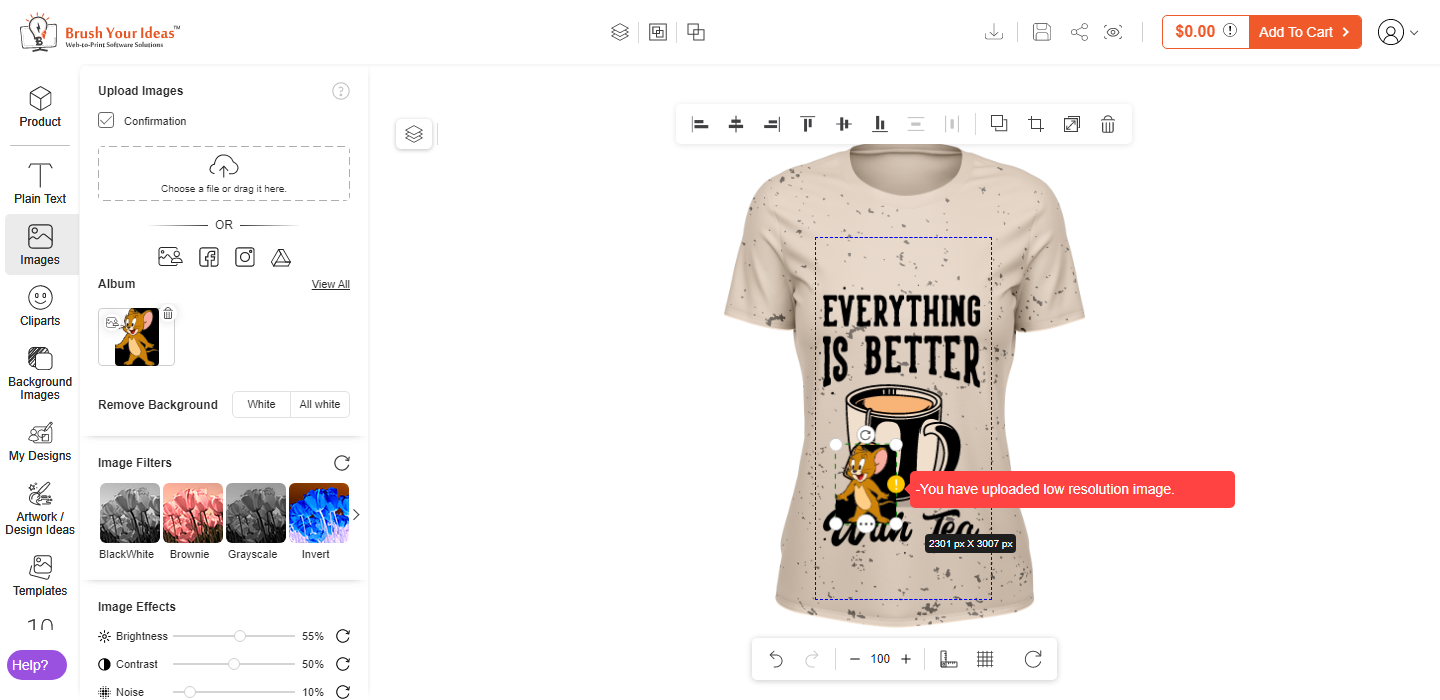
(Notify end-users every time they upload a poor quality custom image)
Maximize your print business’s potential with our comprehensive Product Design Tool. Optimize your
design process, increase efficiency, and deliver exceptional print results.
Editable Vector PDF to Make Quick Changes
Another common challenge for print business owners is to make changes in the output file. What to do if customers want to make changes in the design after the final order has been placed?
Using the Product Design Tool, you can enable the downloading of print ready files which are totally editable.
You can send the link of the file to your customers for approval or any changes to be made. The auto-generated print-ready files are available in various formats including vector, non-vector, and PDF files.
Print-ready files not only saves your time and extra efforts, but they also help increase the overall accuracy of the print workflow.
Easy Management of Output Files and Print Colors
Every printing method needs a unique output file. For instance, digital printing needs vector files, embroidery needs EMB. Secondly, different print methods also do not work with all the colors.
Traditionally, what print businesses do is to use tools like Photopea. You can convert any file into PDF, AI, PSD, XD, and such.
But what if you have a tool that manages all these aspects for you!
Using the Product Design Tool, you can assign color and printing methods to products from the backend. End-users can then select the printing method when customizing the product.
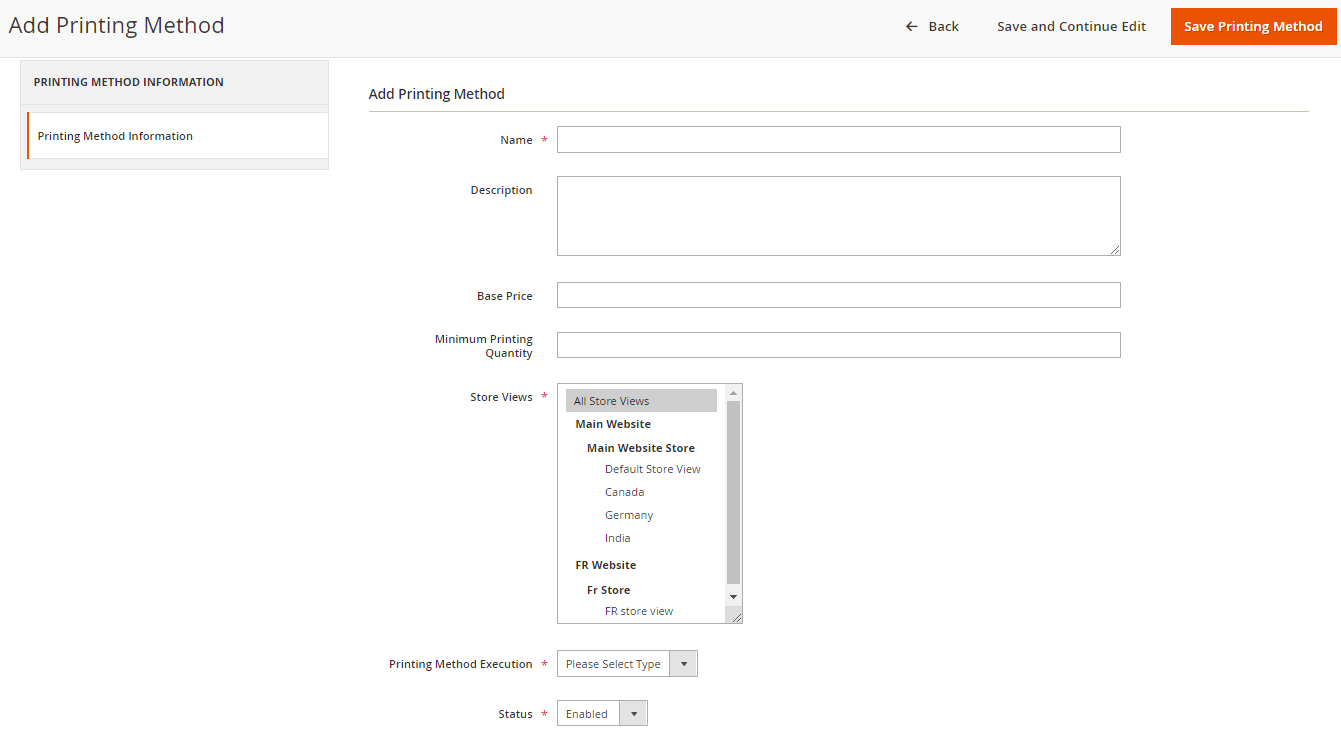
(Easily assign different printing methods based on your needs)
You also get the option to enable or disable a particular output file (raster or vector) as per your needs to streamline the pre press process.
Optimizing Print Accuracy with Gridlines and Rulers
Printing without gridlines and rulers can be a significant challenge, as they hamper the precise positioning and alignment of design elements during the print process.
Without visual guides, it becomes difficult to ensure that elements are accurately placed, leading to misalignment, uneven spacing, and crooked lines in the final print.
This can result in an unprofessional and visually unappealing outcome.
But with a ruler and grid line feature, you can address these challenges easily.
With the product designer tool, you can provide customers with a clear visual reference for alignment and precise measurements. As seen in the image below⬇️
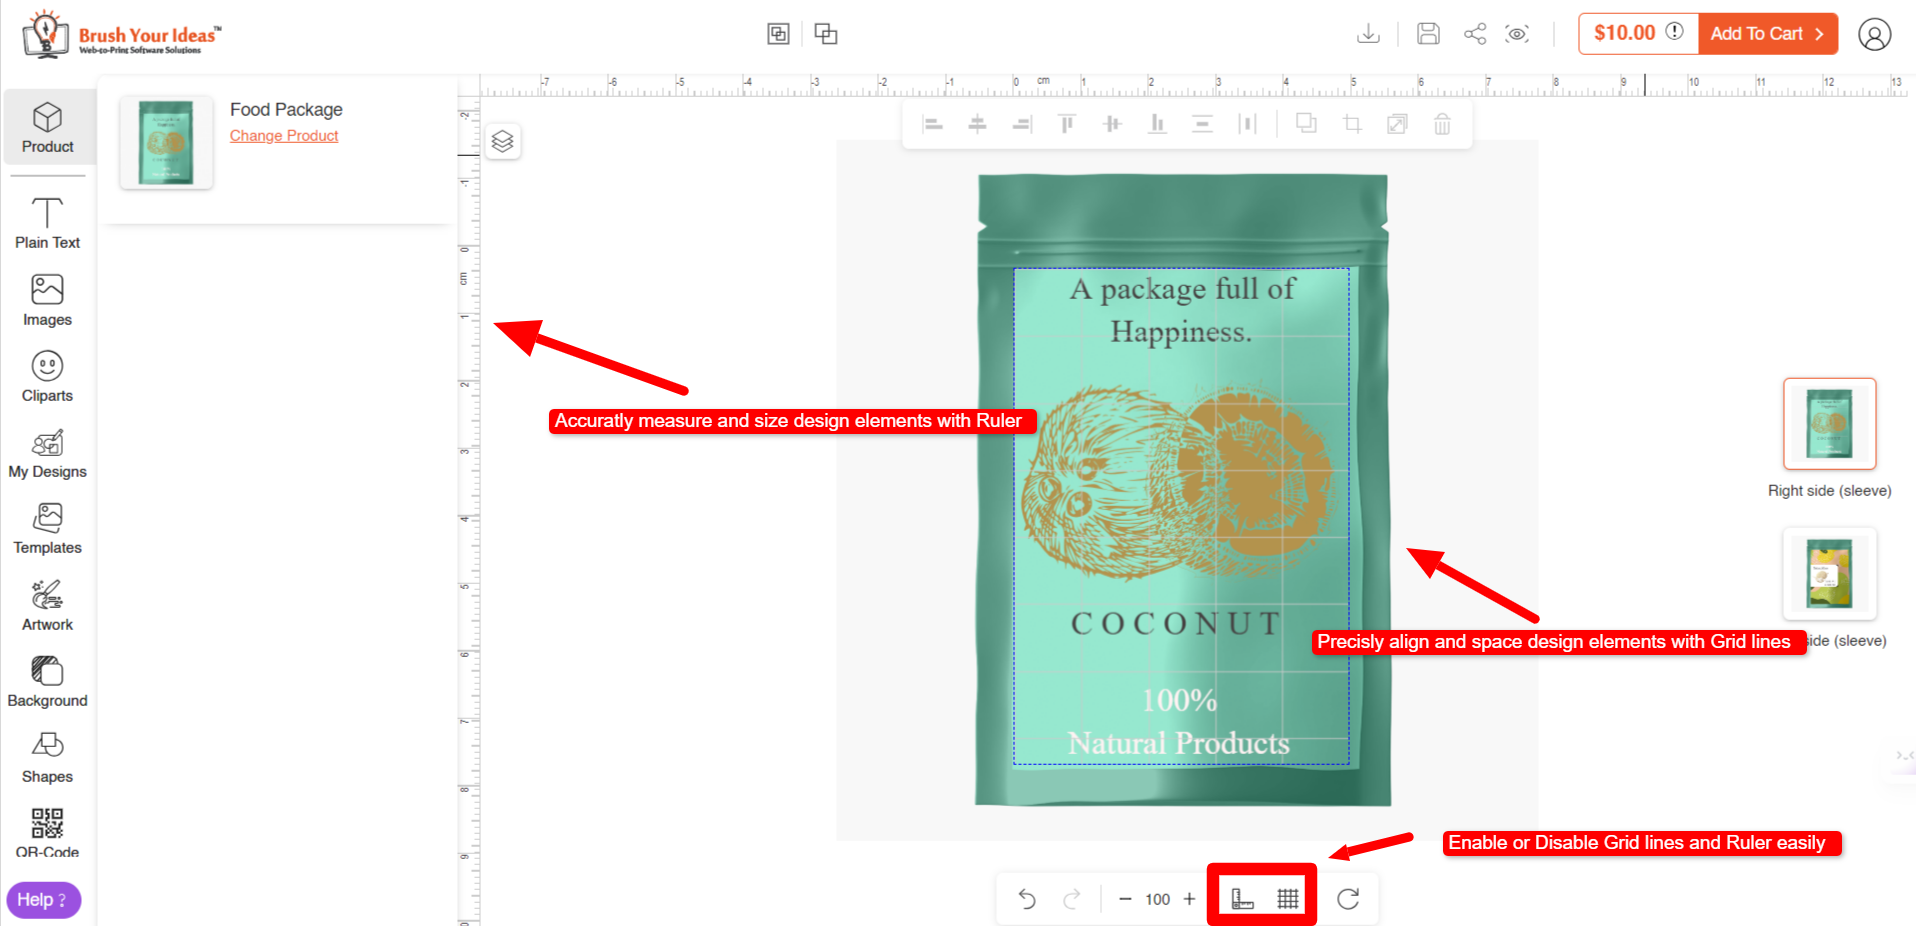 Gridlines ensure that design elements are properly aligned, maintaining consistent spacing and straight lines.
Rulers enable accurate measurements, ensuring that elements are sized correctly and proportionally.
By utilizing gridlines and rulers, customers can overcome the challenges of printing without visual guides, resulting in professional, well-aligned prints.
Overcoming Challenges in Printing Large-format Products
Enlarged customization area, accurate print price estimation, lengthy proofing cycle, issues with proper font size, low image quality are some of the most common challenges that wide-format printers face.
PrintXpand’ Design Tool takes care of all these aspects. And here’s how.
- As per your business needs, you can assign design areas to configurable products, and also add multiple design areas on a single side of the product.
- The personalized UI of the tool ensures that you can deliver an impeccable user experience tailored to products like banners, posters, photo books, wallpaper, and such.
- With a price calculator, you can fasten price generation for bulk products, provide accurate estimation, and auto-generate unit pricing.
- Plus, with various in-built proofing features like ruler and grid lines, safety lines, etc. you can automate the entire proofing cycle.
- Enable personalization for products in bulk using variable data printing.
Click the link below to get all the details about a complete Web to Print Solution for Wide-format printing.
Who is Our Tool For and What You Should Expect
PrintXpand’ Product Design Tool is best suitable for the entire web to print industry. Print service providers, print agents, eCommerce store owners, marketing firms, trade printers, everyone can leverage the tool to solve all the potential hurdles of selling custom products online.
It works on an array of products that has a printable surface. So, whether you sell apparel or jewelry or cards, you can integrate any number of products, and varied kinds of products with the tool.
If you already have an eStore, the tool gets easily integrated with the backend of your eCommerce platform. You can completely customize to match the theme of your business, and also enable or disable features based on your business logic.
With an uncompromised approach on the interface of the tool, you can rest assured that end-users can operate the tool without any hurdles. The intuitive UI ensures that they can customize even the minutest detail with ease. No unnecessary clutter, no unnecessary confusion as to how to use the tool.
The tool provides everything you need to fulfill the needs of selling customizable products. You also get to enjoy the benefits of a dynamic price calculator to provide price transparency, and remove back and forth in sending quotations.
Set price based on varied parameters including print area, printing method, color counter, and so on. You can decide the pricing for each and every attribute.
Take a Personalized Demo Right Away!
This post is just a peripheral overview of how you can solve common printing industry challenges using a Product Design Tool. If you truly want to experience the functionalities of the tool by yourself, you ought to take a personalized demo!
Based on your industry, and business logic, our team will give you a complete product tour. If that sounds enticing, click the link below and we will get back to you.
All product and company names are trademarks™, registered® or copyright© trademarks of their respective holders. Use of them does not imply any affiliation with or endorsement by them.


